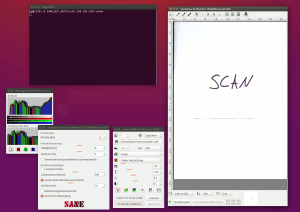
Epson Perfection 1260 USB-Scanner Windows 10 Treiber Fehlanzeige. Ein Dualboot 64Bit Ubuntu Linux hat ebenfalls Probleme den Scanner richtig zu erkennen. Die Lösung, den Epson Perfection per RaspberryPi und Saned im Netzwerk zur Verfügung stellen.
Erster Teil: RaspberryPi mit Raspbian installieren und …
pi@raspberrypi:~# sudo su -
root@raspberrypi:~# apt-get update
root@raspberrypi:~# apt-get upgrade
root@raspberrypi:~# apt-get install sane
Scanner an den USB-Port des RaspberryPi anstecken und kontrollieren, ob dieser gefunden wird.
root@raspberrypi:~# dmesg
[...]
[  243.136397] usb 1-1.3: Product: EPSON Scanner
[  243.136410] usb 1-1.3: Manufacturer: EPSON

root@raspberrypi:~# lsusb
[...]
Bus 001 Device 003: ID 0424:ec00 Standard Microsystems Corp.
Bus 001 Device 004: ID 04b8:011d Seiko Epson Corp. Perfection 1260 Photo

root@raspberrypi:~# sane-find-scanner
[...]
found USB scanner (vendor=0x04b8 [EPSON], product=0x011d [EPSON Scanner], chip=LM9832/3) at libusb:001:004
found USB scanner (vendor=0x0424, product=0xec00) at libusb:001:003
[...]

root@raspberrypi:~# scanimage -L
device `plustek:libusb:001:004' is a Epson Perfection 1260/Photo flatbed scanner
Nun können bereits Scans auf der Konsole ausgeführt werden. Beispiele:
root@raspberrypi:~# scanimage --mode Gray --warmup-time 10 --format=png >image.png

root@raspberrypi:~# scanimage -x 215 -y 297 --resolution 300 --depth 8 --mode Color --warmup-time 10 --format=tiff >image.tiff
RaspberryPi / Raspbian auf Saned Netzwerk Damon umstellen. Hier nur mit den betroffenen, geänderten Konfigurations-Parametern.
vim /etc/default/saned
RUN=yes

vim /etc/sane.d/plustek.conf
[usb]
option warmup 10

vim /etc/sane.d/dll.conf
net
plustek

vim /etc/sane.d/saned.conf
localhost
192.168.101.0/24            #-> zugreifendes Netzwerk

vim /etc/sane.d/net.conf
connect_timeout = 10
localhost
Saned mit der geänderten Konfiguration neu starten und anschließender Kontrolle ob der Scanner nun über IP erreichbar ist.
root@raspberrypi:~# service saned restart
Restarting SANE network scanner server: saned.

root@raspberrypi:/etc/sane.d# ss -aln
State       Recv-Q Send-Q                Local Address:Port                  Peer Address:Port
LISTEN      0      1                                 *:6566                             *:*

root@raspberrypi:~# scanimage -L
device `plustek:libusb:001:004' is a Epson Perfection 1260/Photo flatbed scanner
device `net:localhost:plustek:libusb:001:004' is a Epson Perfection 1260/Photo flatbed scanner
Nach ein paar update/upgrade runden des raspis startet saned die benötigte Netzwerk-Komponente nicht mehr.
root@raspberrypi:~# scanimage -L
device `plustek:libusb:001:004' is a Epson Perfection 1260/Photo flatbed scanner

root@raspberrypi:~# systemctl restart saned
Failed to restart saned.service: Unit saned.service is masked.
Der Workaround wurde auch hier im Bug Report auf launchpad beschrieben.
root@raspberrypi:~# systemctl start saned.socket
root@raspberrypi:~# scanimage -L
device `plustek:libusb:001:004' is a Epson Perfection 1260/Photo flatbed scanner
device `net:localhost:plustek:libusb:001:004' is a Epson Perfection 1260/Photo flatbed scanner
Noch ein Workaround saned einfach als daemon auf der Konsole starten.
root@raspberrypi:~# saned -d -a saned
root@raspberrypi:~# ps faux
[...]
root       995  0.0  0.3   9288  1432 ?        Ss   09:36   0:00 saned -d -a saned
root       996  0.0  0.7   9288  2660 ?        S    09:36   0:00  \_ saned -d -a saned
Zweiter Teil: VirtualBox Ubuntu-VM als XSane Client. Desktop Ubuntu 64Bit Version installieren und …
hp@ubuntu:~$ sudo su -
root@ubuntu:~# apt-get update
root@ubuntu:~# apt-get upgrade
root@ubuntu:~# apt-get install sane xsane
Konfiguration von Sane wieder nur mit den wichtigen Änderungen und anschließender Kontrolle, ob der Scanner per IP zu erreichen ist.
vim /etc/sane.d/net.conf
connect_timeout = 10
192.168.101.250              #-> IP vom RaspberryPi

vim /etc/sane.d/dll.conf
net
plustek

root@ubuntu:~# scanimage -L device `net:192.168.101.250:plustek:libusb:001:004' is a Epson Perfection 1260/Photo flatbed scanner
Eventuell gibt es einen Bug in der net.conf deshalb XSane mit Umgebungsvariable der IP auf der Konsole als normaler User starten.
hp@ubuntu:~$ SANE_NET_HOSTS=192.168.101.250 scanimage -L
hp@ubuntu:~$ SANE_NET_HOSTS=192.168.101.250 xsane

Mit einem gemeinsamen Ordner des Gast Windows und der VirtualBox Ubuntu-VM ist der Austausch der gescannten Dateien direkt möglich. Bei evtl. auftretenden Schwierigkeiten/Fehlermeldungen von XSane hilft es, im home das xsane Verzeichnis zu löschen und anschließend XSane neu aufzurufen.
hp@ubuntu:~$ rm -rf .sane/xsane